If you’ve ever experienced the frustration of your false eyelashes lifting at the outer corners, fear not, because we have a solution for you! Ensuring that the outer corners of your lashes stay securely in place can be a game-changer for achieving that flawless, glamorous look. In this article, we will share some practical tips and tricks that will help you tackle this common beauty challenge with ease. So, say goodbye to pesky lifting lashes and hello to a flawless and secure lash application!

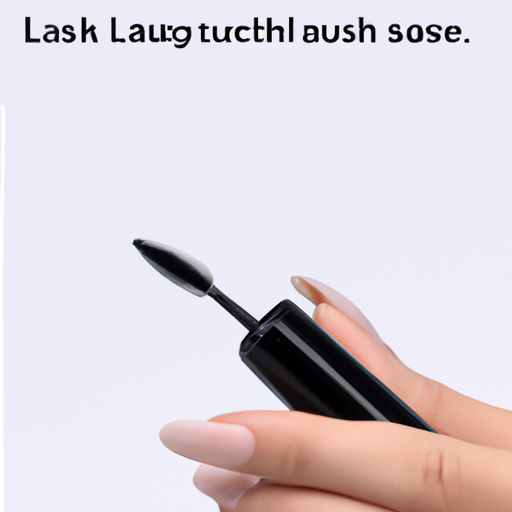
Choosing the Right Lash Adhesive
When it comes to applying false lashes, choosing the right lash adhesive is crucial for ensuring a secure and long-lasting hold. With various options available in the market, finding a reliable lash adhesive can seem overwhelming. However, there are a few key factors to consider that can help you make an informed decision.
Finding a reliable lash adhesive
To ensure your false lashes stay in place throughout the day, it is important to opt for a lash adhesive that is known for its durability and strength. Look for adhesives that are specifically formulated for false lashes and have a reputation for long-lasting hold. Reading reviews and seeking recommendations from friends or beauty professionals can also be helpful in finding a reliable lash adhesive.
Opting for waterproof lash adhesives
If you want your false lashes to withstand tears, humidity, or any water-related activities, it is essential to choose a waterproof lash adhesive. Waterproof adhesives are designed to provide a secure bond that is resistant to moisture, ensuring that your lashes stay in place even in the most challenging conditions. Whether you’re attending a wedding, hitting the beach, or simply going about your day, opting for a waterproof lash adhesive can give you the confidence that your lashes will stay secure.
Using clear or black lash adhesives
When it comes to the color of lash adhesive, you have the option to choose between clear and black. Clear lash adhesive is a great choice if you want a more natural and seamless look. It dries clear, making it virtually invisible once applied. On the other hand, black lash adhesive can add depth and intensity to your lash line, giving the appearance of fuller, more dramatic lashes. The choice between clear and black lash adhesive ultimately depends on your personal preference and desired look.
Applying Lash Adhesive
Once you have chosen the perfect lash adhesive, the next step is to apply it correctly to ensure a strong bond with your false lashes.
Applying lash adhesive correctly
To apply lash adhesive correctly, start by squeezing a small amount onto the back of your hand or a clean surface. Using a small brush or the tip of an applicator, gently distribute the adhesive along the lash band, ensuring an even and thin layer. Avoid applying too much adhesive as it can lead to a messy application and discomfort. Remember, a little goes a long way when it comes to lash adhesive.
Using a small brush or applicator
Using a small brush or an applicator specifically designed for lash adhesive can make the application process much easier. These tools allow for precision and control, ensuring that you can apply the adhesive exactly where you need it without any mess or excess product. The brush or applicator should have a fine tip for precise application and a comfortable handle for easy grip.
Allowing the adhesive to become tacky
After applying the lash adhesive, it is crucial to allow it to become tacky before attaching your false lashes. This usually takes about 30 seconds to a minute, depending on the adhesive you are using. Tacky adhesive holds better and ensures a stronger bond with the lashes, preventing them from slipping or falling off. Avoid applying the lashes immediately after applying the adhesive, as the wet adhesive may not provide a secure hold.
Applying False Lashes
Now that you have prepared your lash adhesive, it’s time to apply your false lashes for a stunning, enhanced look.
Positioning the lashes correctly
To position your false lashes correctly, start by gently lifting the lashes with a pair of clean lash tweezers or your fingertips. Align the lashes with your natural lash line, ensuring that they are neither too close to the inner corner nor too far towards the outer corner. Adjust the position until you achieve the desired look, making sure that the lash band is fully adhered to your natural lashes.
Placing an extra dot of adhesive on the outer corners
The outer corners of false lashes tend to be more prone to lifting or coming off throughout the day. To ensure extra security, you can place a small dot of lash adhesive on the outer corners of the lash band. This will provide additional reinforcement and prevent the edges from popping up or lifting prematurely. Be sure to use a minimal amount of adhesive to avoid any visible residue or discomfort.
Pressing down and holding for a few seconds
Once you have positioned your false lashes and added extra adhesive to the outer corners, gently press down on the lashes using your fingertips or a clean lash applicator. Hold the lashes in place for a few seconds to allow the adhesive to fully bond with your natural lashes. Applying gentle pressure ensures a secure hold and helps the lashes blend seamlessly with your own, giving you a natural and flawless appearance.
Trimming False Lashes
While false lashes come in various lengths, it is common for them to require some trimming to achieve the perfect fit for your eyes.
Measuring the length of the lashes
Before trimming your false lashes, it is important to measure them against your natural lash line. Place the lashes on your eyelid without adhesive and check if they extend beyond your natural lashes or go past the outer corner of your eyes. If the lashes are too long, it’s time to trim them for a more comfortable and natural-looking fit.
Trimming the outer corner for a better fit
If your false lashes are longer than your natural lash line, carefully trim the outer corner of the lashes using small, sharp scissors. It is crucial to take your time and trim small sections at a time to ensure you don’t trim too much off. Gradually trim and test the length until the lashes fit comfortably and align with your outer corner.
Ensuring the lashes are not too long
While trimming false lashes is a common practice, it is important to ensure that you don’t cut them too short. Lashes that are too short may not provide the desired effect or blend well with your natural lashes. As a general rule, it’s better to start with longer lashes and gradually trim them to achieve the perfect length rather than cutting them too short from the beginning.

Using Lash Tools
Lash tools can be incredibly helpful in achieving precise and professional-looking results when applying false lashes.
Using lash tweezers for precision
Lash tweezers, also known as lash applicators or lash placement tools, are designed to provide optimal control and precision during the application process. These tools feature a curved design that allows you to effortlessly grip your false lashes and place them as close to your natural lash line as possible. The curved tip also helps in positioning the lashes evenly along the entire lash line for a seamless and natural look.
Using a lash applicator for stability
A lash applicator is another useful tool for applying false lashes. It is designed to hold the lashes securely and provide stability during the application process. The applicator usually has a pointed tip for easy and accurate placement, making it an excellent choice for beginners or those who struggle with using tweezers. The stability offered by a lash applicator ensures that your lashes stay in place and allows for better control over the overall application.
Using a lash curler to blend natural and false lashes
To achieve a more cohesive and blended look between your natural lashes and false lashes, consider using a lash curler. Before applying your false lashes, curl your natural lashes using a lash curler. This step not only helps to lift and curl your natural lashes but also prepares them to blend seamlessly with the false lashes. Curling both your natural and false lashes together creates a more uniform and stunning effect.
Avoiding Excessive Mascara
While mascara can enhance the look of your natural lashes, it is important to use it sparingly when wearing false lashes.
Not applying too much mascara on the outer corners
When wearing false lashes, it’s important to avoid applying excessive mascara on the outer corners. Doing so can weigh down the lashes and cause them to fall off or lose their shape more quickly. Instead, focus on applying mascara to your natural lashes before attaching the false lashes. This will help blend your natural lashes with the false lashes without adding unnecessary weight or clumps of mascara.
Using mascara sparingly on false lashes
If you do choose to apply mascara to your false lashes, it is crucial to do so sparingly. Use a lightweight mascara formula and apply it delicately from the base to the tips of the lashes. Be cautious not to apply too much pressure or overload the lashes with mascara. The goal is to enhance the appearance of the false lashes without compromising their integrity or lifespan.
Avoiding waterproof mascara on false lashes
While waterproof mascara is known for its long-lasting and smudge-proof properties, it is best to avoid using it on false lashes. Waterproof mascara can be difficult to remove, and the removal process can potentially damage your false lashes. Additionally, the strong and sticky nature of waterproof mascara can make it challenging to separate and maintain the natural look of your false lashes. Opt for a regular mascara formula if you feel the need to enhance the appearance of your false lashes.

Opting for Natural-Looking Lashes
If you prefer a more subtle and natural look, there are certain factors to consider when selecting false lashes.
Choosing lashes with a more natural look
To achieve a natural-looking result, opt for false lashes that mimic the texture and density of natural lashes. Look for lashes that have a tapered end, varying lengths, and a lightweight feel. These lashes will blend seamlessly with your natural lashes and give the appearance of fullness and length without looking overly dramatic or heavy.
Opting for individual or flared lashes
Individual or flared lashes are another great option for achieving a subtle and natural look. Unlike strip lashes, individual or flared lashes allow for a more customized application. You can strategically place these individual lashes along your lash line, focusing on sparse areas or areas that need extra volume. This method gives you more control over the final result and creates a more natural appearance.
Avoiding heavy and dramatic lash styles
While dramatic lash styles can make a statement and add a touch of glamour, they may not be the best choice if you’re aiming for a natural-looking result. Heavy and overly dramatic lash styles can overpower your natural lashes and give an artificial appearance. Opt for lashes that have a wispy or tapered design, as they tend to look more natural and blend seamlessly with your own lashes.
Removing False Lashes
Removing false lashes properly is essential to avoid any damage to your natural lashes and to ensure that the false lashes can be reused.
Applying an oil-based makeup remover
To remove false lashes, start by applying an oil-based makeup remover to a cotton pad or a Q-tip. Gently press the pad or Q-tip against the lash line and the base of the false lashes. Allow the oil-based remover to dissolve the lash adhesive and loosen the lashes from your natural lashes. The oil-based formula helps break down the adhesive without causing any discomfort or damage.
Gently pulling the lashes off
Once the lash adhesive has been properly loosened by the oil-based makeup remover, gently pinch the false lashes between your thumb and forefinger and slowly pull them away from your natural lashes. Avoid pulling or tugging too hard, as this can potentially damage your natural lashes. If you experience any resistance, apply more oil-based makeup remover and repeat the process until the lashes come off easily.
Cleaning and storing the lashes properly
After removing your false lashes, it is important to clean them thoroughly to remove any residual adhesive or makeup. Start by gently peeling off any excess adhesive from the lash band using your fingertips or a clean tweezers. Then, soak a cotton pad or Q-tip in makeup remover and gently wipe the lashes to remove any mascara or other makeup product. Once the lashes are clean, store them in their original packaging or a clean, dry container to protect their shape and prevent any damage.
Maintaining Lash Health
While false lashes can enhance your look and boost your confidence, it is important to take care of your natural lashes to maintain their health.
Avoiding unnecessary tugging or rubbing
When wearing false lashes, it is crucial to avoid any unnecessary tugging or rubbing, as this can potentially damage your natural lashes. Be gentle when removing eye makeup or applying skincare products around the eye area. Avoid pulling or rubbing your eyes excessively, as this can dislodge the false lashes or cause your natural lashes to weaken and fall out.
Removing lashes gently to prevent damage
When it comes time to remove your false lashes, always remember to be gentle. Follow the proper removal technique mentioned earlier and avoid any forceful pulling or tugging. Rushing the removal process or being too rough can result in lash and eye damage, including pulling out or breaking off your natural lashes.
Cleansing lashes regularly
To maintain the hygiene of your false lashes and the health of your natural lashes, it is important to cleanse your lashes regularly. Use a gentle eye makeup remover or a lash cleanser specifically designed for false lashes to remove any residual makeup, oil, or dirt. Clean lashes help prevent any bacterial growth or eye infections, allowing your natural lashes to grow and thrive.
Seeking Professional Help
If you’re looking for expert advice or want to take your lash game to the next level, considering professional help can be a great option.
Visiting a lash technician for expert advice
If you’re unsure about choosing the right lashes, applying them correctly, or maintaining lash health, consider visiting a lash technician for expert advice. Lash technicians are trained professionals who can assess your eye shape, recommend the most suitable lash styles, and provide personalized tips and tricks for achieving the best results. They can also guide you on lash care and maintenance, ensuring that your lashes stay healthy and beautiful.
Getting lash extensions professionally applied
For a more long-term solution, consider getting lash extensions professionally applied. Lash extensions are individual synthetic lashes that are meticulously applied to your natural lashes by a trained professional. This gives you a customized and natural-looking result that can last several weeks with proper care. Professional lash extensions ensure a perfect fit, enhance your natural lashes, and eliminate the need for daily false lash application.
Considering lash lift or perm treatments
If you want to enhance the natural beauty of your lashes without using false lashes or extensions, consider lash lift or perm treatments. These treatments involve curling or perming your natural lashes to create a more lifted and fluttery look. The results can last several weeks, and with proper care, you can enjoy beautifully curled lashes without the need for additional products or maintenance.
In conclusion, choosing the right lash adhesive, applying it correctly, and mastering the art of false lash application are key elements to achieve stunning, long-lasting lashes. Trimming false lashes to the right length, using lash tools for precision, and avoiding excessive mascara ensure a seamless and natural look. Proper removal, maintenance, and seeking professional help when needed contribute to lash health and overall confidence. By following these tips and techniques, you can confidently rock breathtaking lashes that enhance your natural beauty.